
This DELIGHTFUL D.I.Y. is completely a how-to. So, loyal readers, if you aren’t interested in even the before and after pictures, close-it-up now, and I’ll ‘see’ you next week…. Since before we moved here, we knew we wanted to change the upstairs hall floor in the ‘newer’ wing (1970s). (For the work we did on the hallway and stairs in the old (1920’s) wing, see the middle section of this post: https://bluebellmountainblog.wordpress.com/2017/02/06/log-cabin-legends-part-ii-phyllis/ )
Mom has had to deal with the remains of others’ ‘ideas’; that is the GOOD idea to rip out the old and dirty 1970s carpeting that was in the hallway outside her bedroom/livingroom area, BUT the BAD idea to just leave the mish-mash of plywood sub-flooring and to STAIN IT DARK AND URETHANE WITH MEGA-SHINE ! This is not only far too dark for this hallway with no windows of its own, BUT it enhances the cracks and bits and bobs of boards cut and angled every which way.


Many options were discussed, but we didn’t want to spend a lot of money NOR did any of us really want to do the non-eco-friendly laminate or vinyl thing. Ugh. But Mom did see some laminate flooring boards she thought would work well – and to my surprise they were a light grey and rather rustic-looking! I said “Mom, I can paint this same effect and it’ll cost under 100.00”. Which I did.
Now, while there’s a soft-wood tongue and groove floor under the sub-flooring we didn’t know what state it was in, nor did we have the time/money/ or inclination to have our lives disrupted while all the plywood was ripped out and yet more decisions made on what to do with IT. (Plus it wouldn’t have been level with the other floors in her bedroom and living room!)
So, painting a plywood floor to look like old, worn planks – here we go!
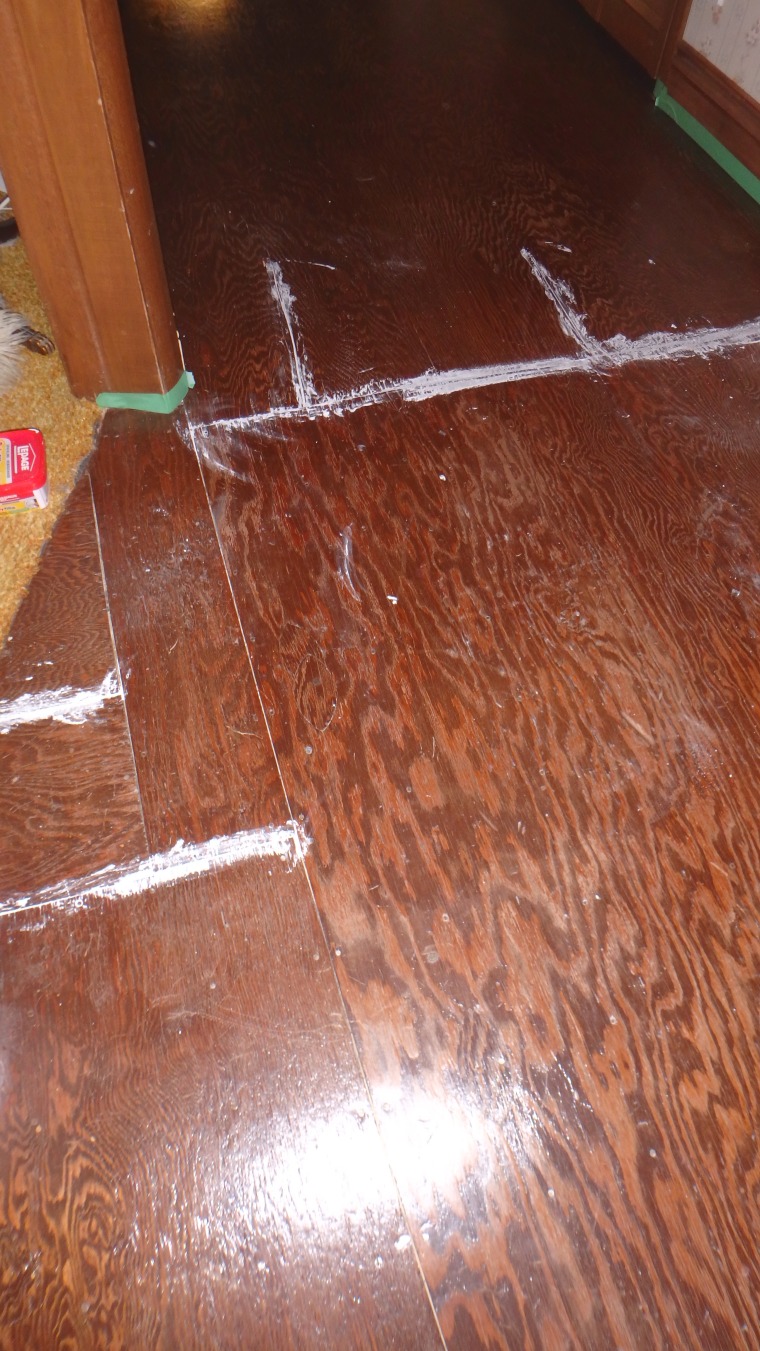
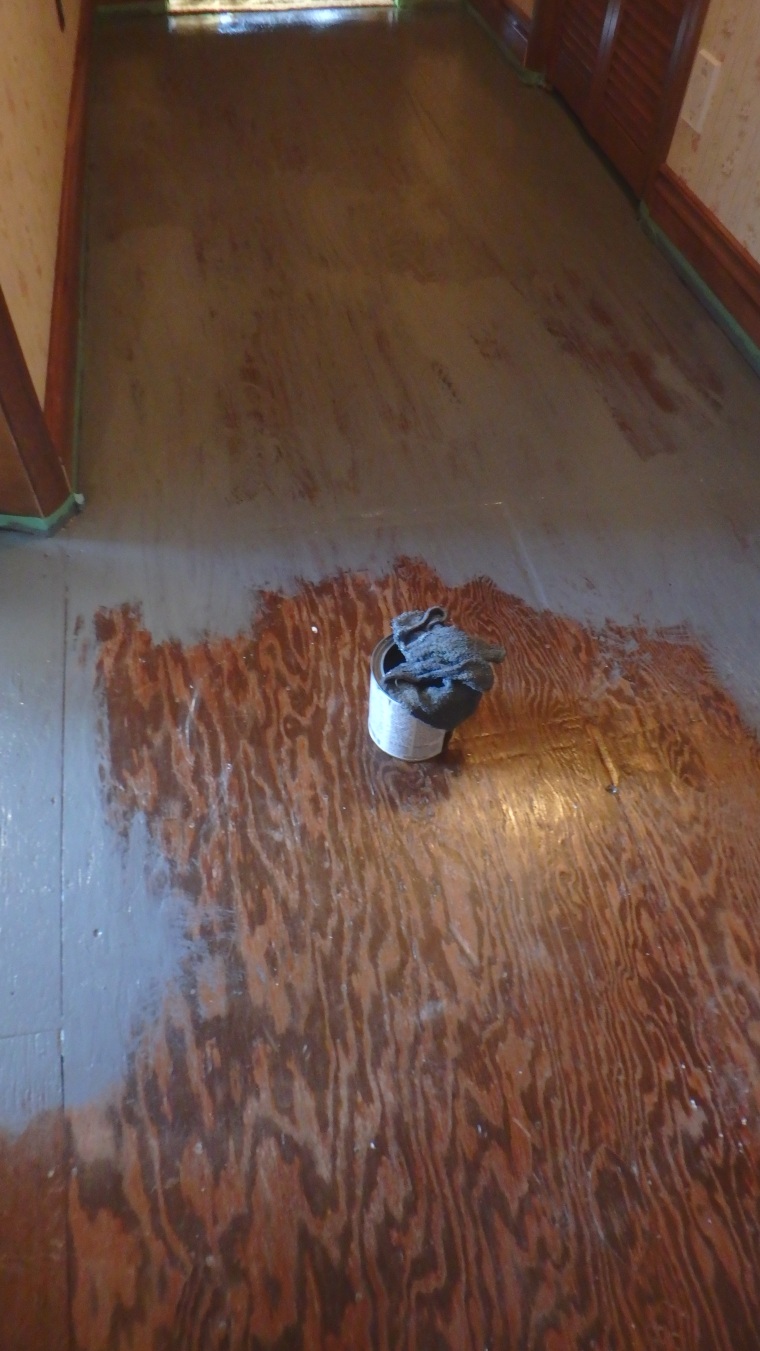
While Mom was away for 3 weeks in Nfld. visiting my sister and her only grandchild, I thought the time was ideal. We’re expecting a LOT of visitors this spring/summer/fall (why doesn’t anyone want to come in winter when we’re bored and LONELY?????) But, though she was gone, I still wasn’t about to make a huge mess or an unhealthy environment by sanding the plywood first. Soooo, since a grey under-coat is essential for the right ‘look’, I simply bought a Rustcoat Primer to go right over the shiny varnished existing floor. But first, I filled in all those cracks that go every-which-way, leaving only the cracks that went lengthwise, which I would be replicating anyway (adding to the realism!)
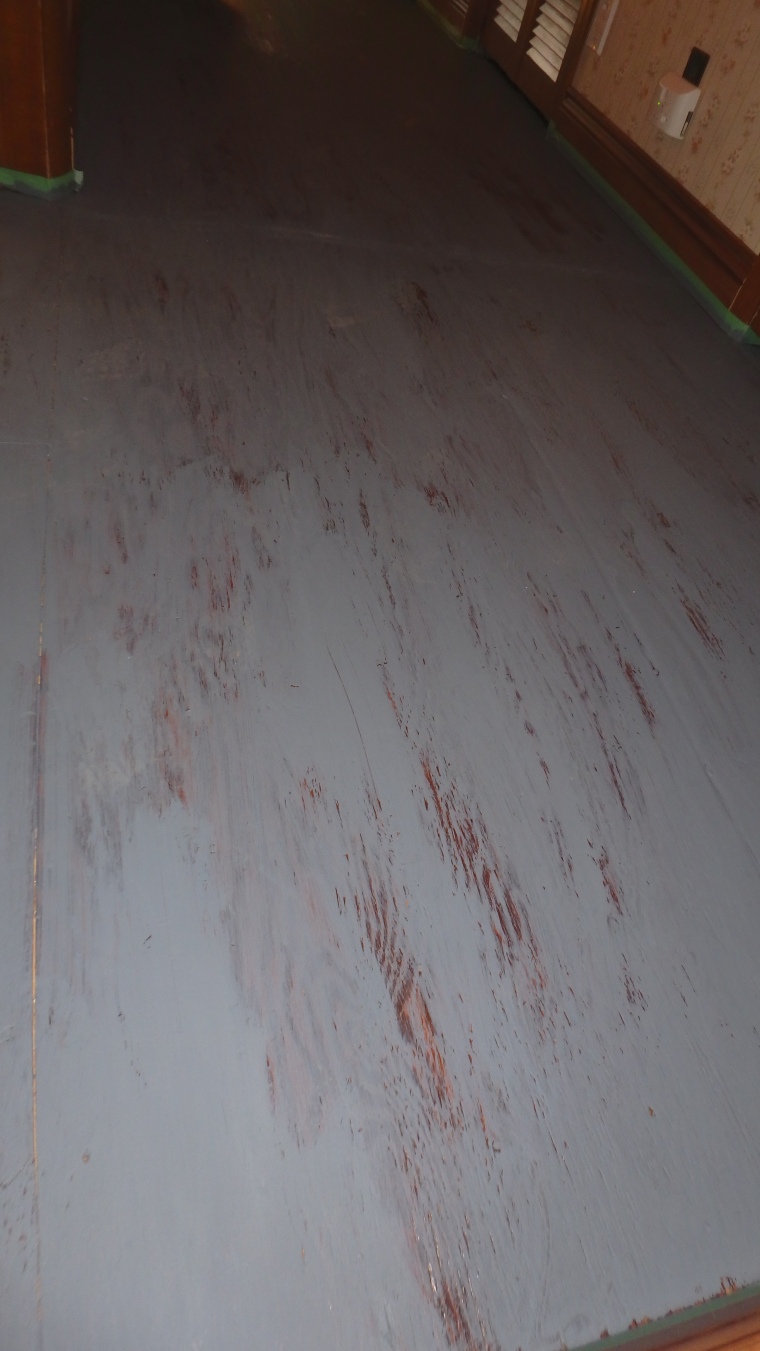
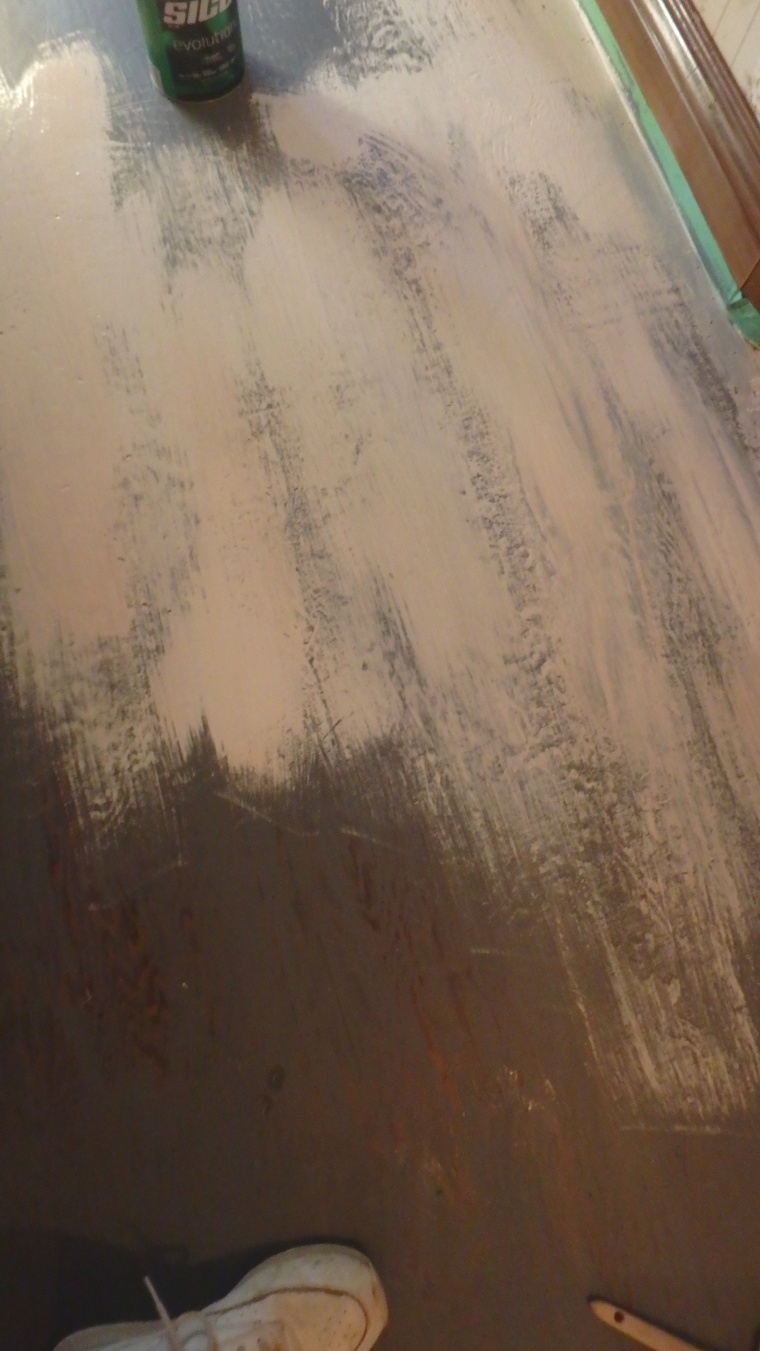
Then I started painting, always with a dry brush to make it ‘streaky’ and sometimes with a rag to ‘wipe’, as the whole look was to be ‘distressed’, emulating the worn-through grain – that is, wherever the plywood’s grain might actually be going the ‘right’ way!
In the good ‘grainy’ parts, I even wanted a bit of the brown to show through, to add even more texture, as you’ll see below. So, it was a bit of artistic working as I went along to decide what parts would look good coming through, and what needed to be wholly covered because it was too obviously plywood …
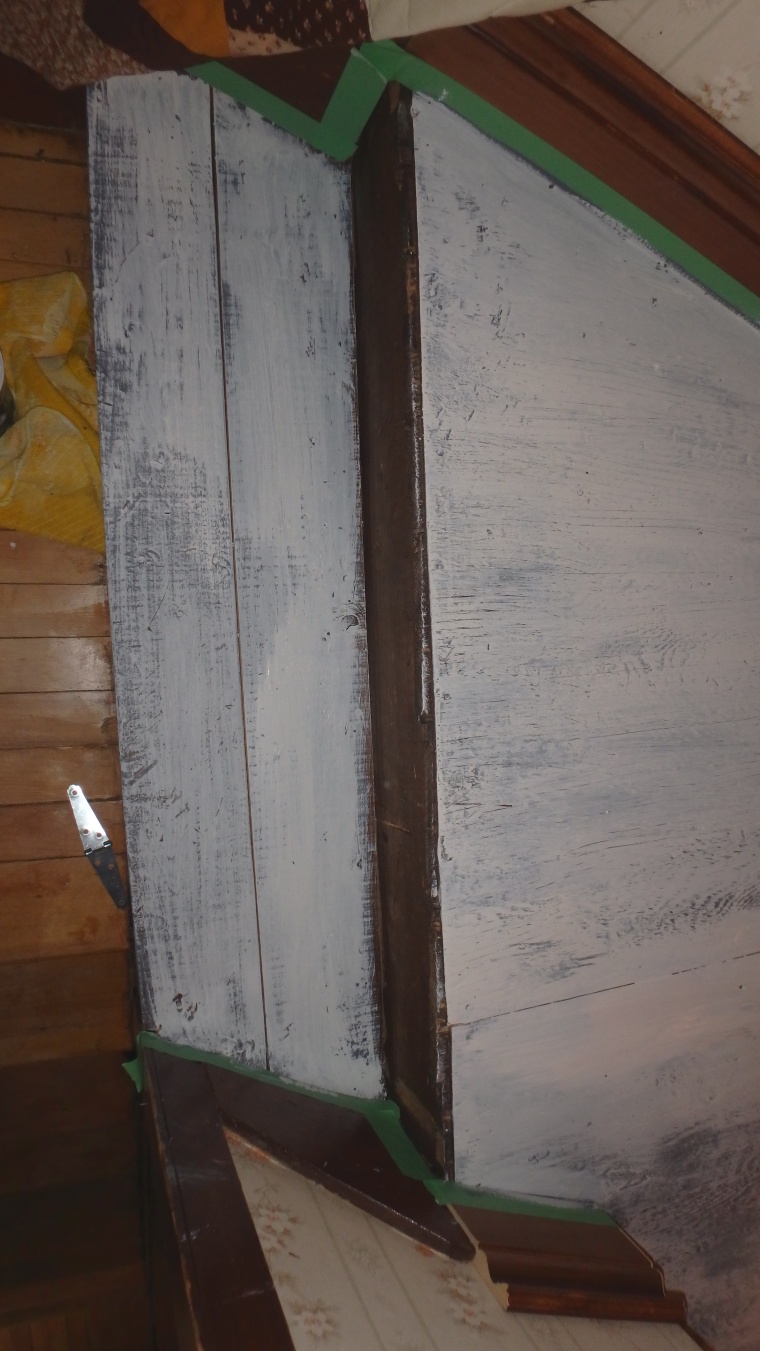
After letting all the grey dry, I streaked some lower areas with a peach colour, as we didn’t want the white to be too white and drastic (also, I had the white I bought also lightly tinted with peach). We chose peach because it’s in Mom’s Turkish rug that she likes in the hall, in the old floral wallpaper throughout BOTH hallways, and also peach is a bit in her bedroom and in the quilt in the landing… but you could choose a tint of whatever colour you’re trying to bring out). So, here’s the blotches of peach I slapped thickly on!
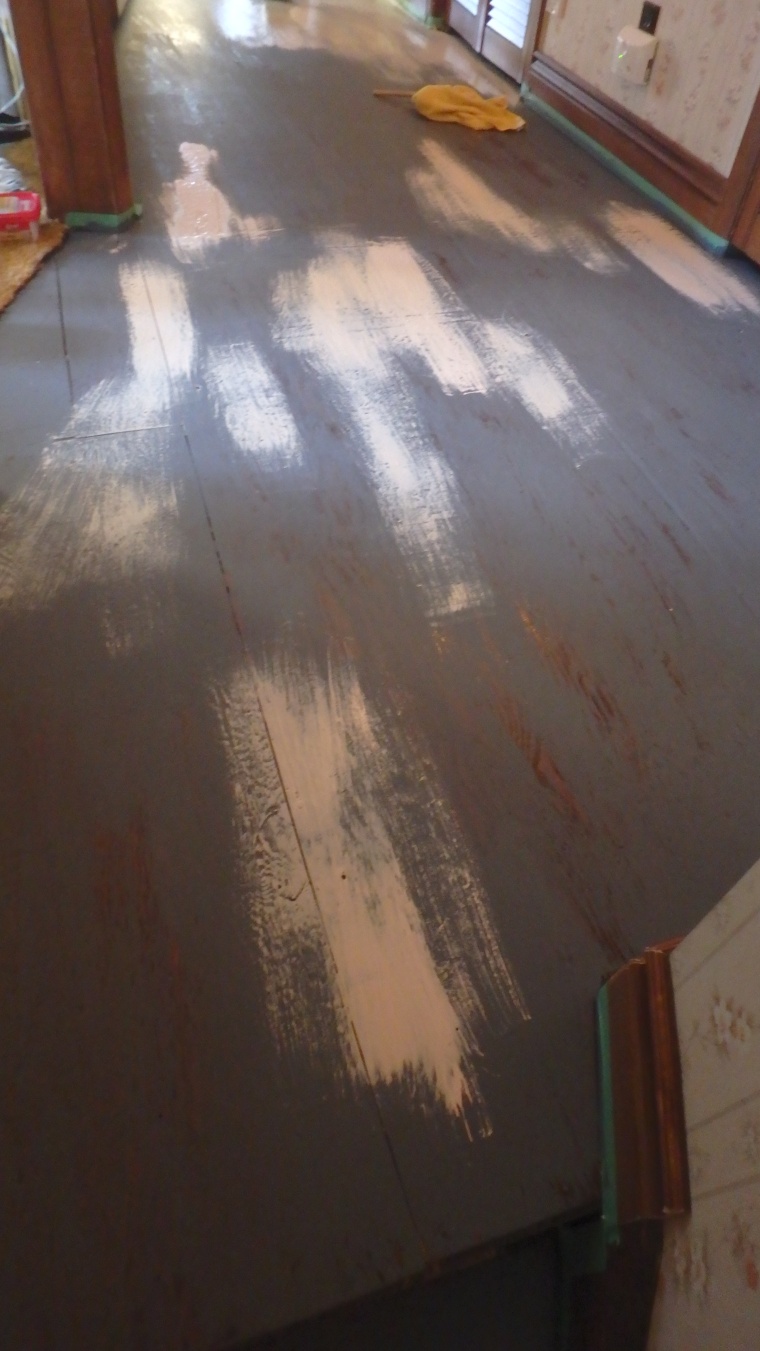
After all that was dry (several days later!) I started the really tricky bit. Trying to keep a stiff, mostly dry brush and streaking the white paint on all in long brush strokes to try and give the impression of grain in big,wide old pine planks that most farmhouses would have had originally if they couldn’t afford hardwood floors!
I tried to leave the grainy spots I’d already decided on and wiped showing through, and then had to add more white to the spots where I’d painted peach, so that it wasn’t too obvious that the PEACH was showing through. Quite a balancing act, and a lot of standing back, looking and musing…
The tricky thing is to never have a paint brush line like so:
You’ve got to be very careful to blend your strokes so that it will look like a uniformed ‘streak’ to give the effect of big long boards…
Then, before the white dried in areas, I would use what I call the ‘rake comb’ to drag more lines on going the same way as the grain. This would make it look MORE like the grain of big boards, and less like the plywood it is. But then you have to ‘soften’ those lines with the brush again, to make it seem more subtle! So that’s MORE with the artistic eye plugged in and not the sleepy-head farmer I sometimes was up there!


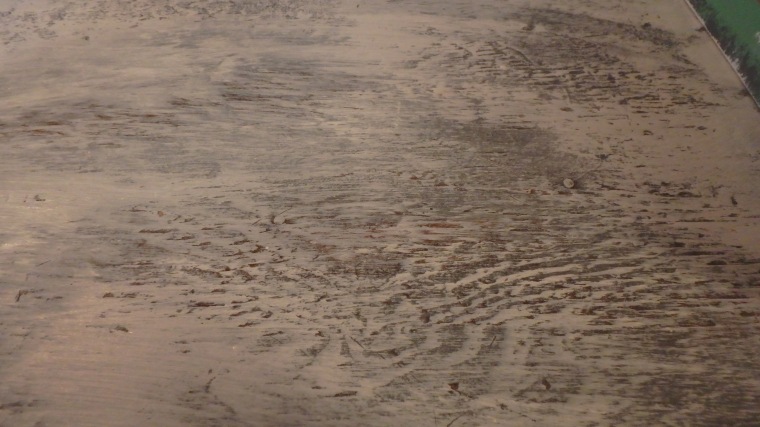
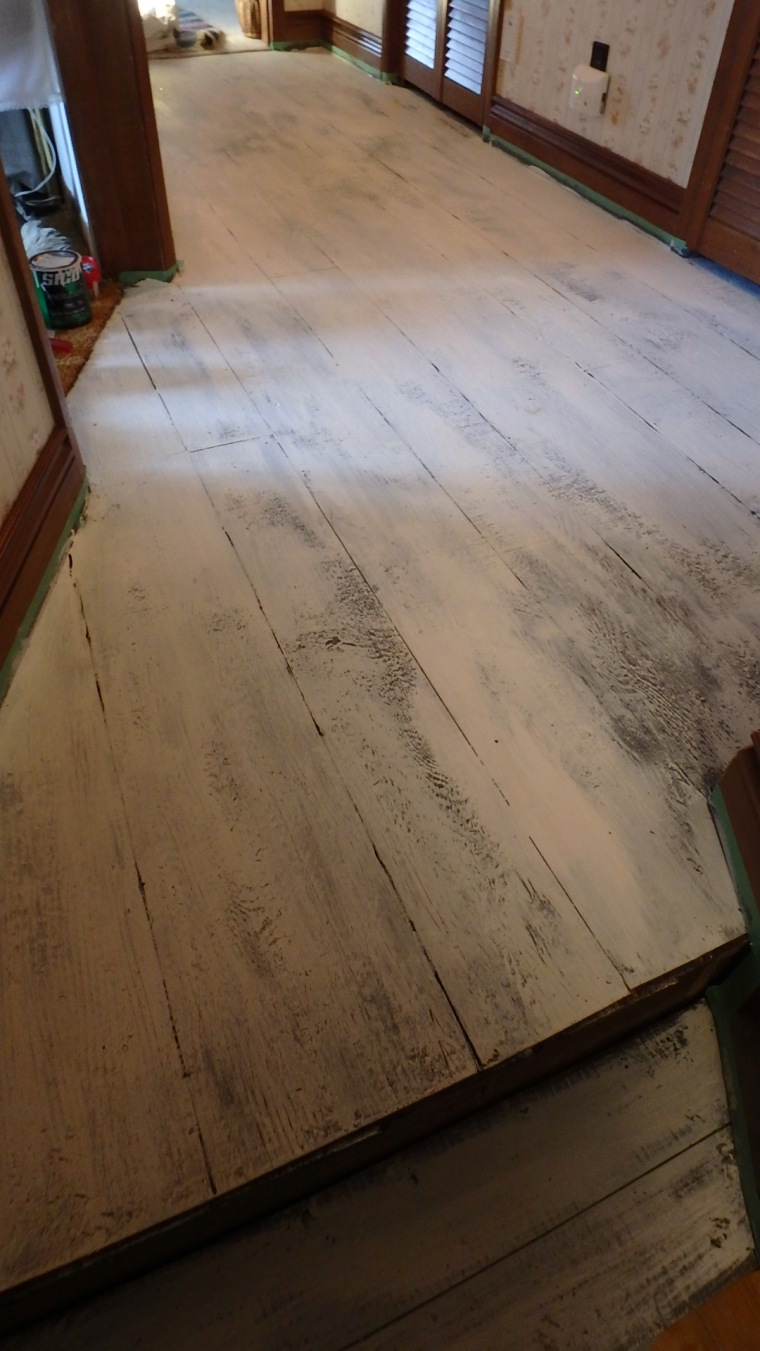
When all the white was dry, I took pleasure in several of my favourite ‘well-worn-with time’ spots. This is one of them:
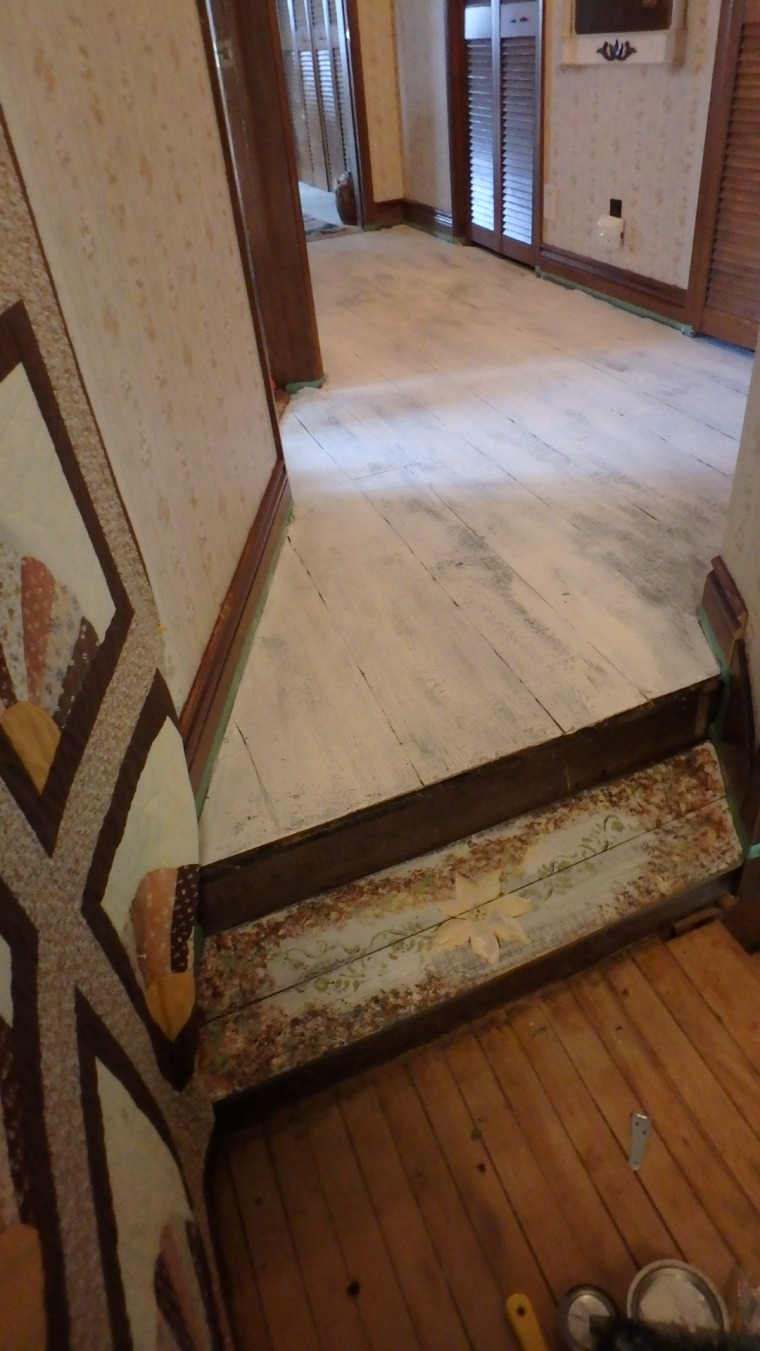
I streaky-painted the one little step transitioning into this hallway from the landing as well, but it was too drastic a colour switch from the blond floor to the white, so I’ll show you how I solved this later…
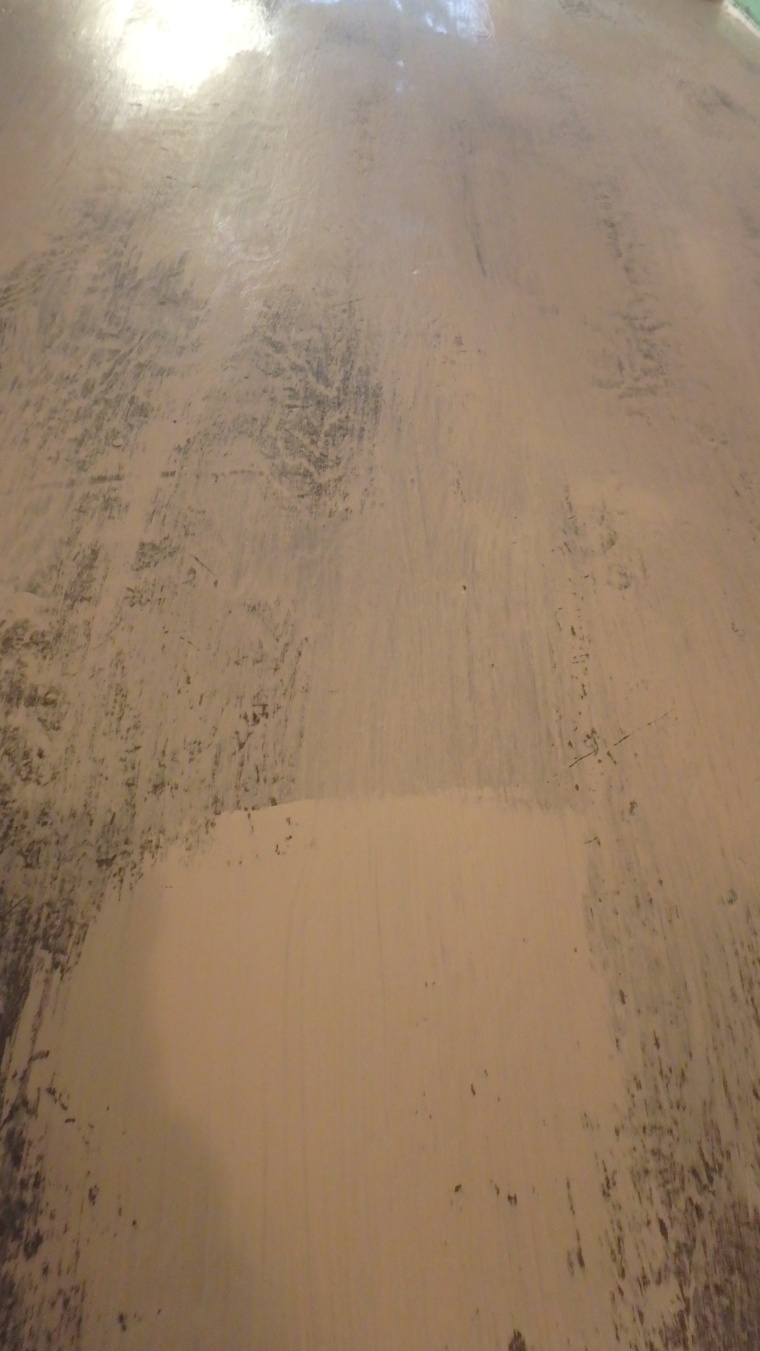
Here is the floor painted all white, with some areas rubbed gently off to let even more grey show through.
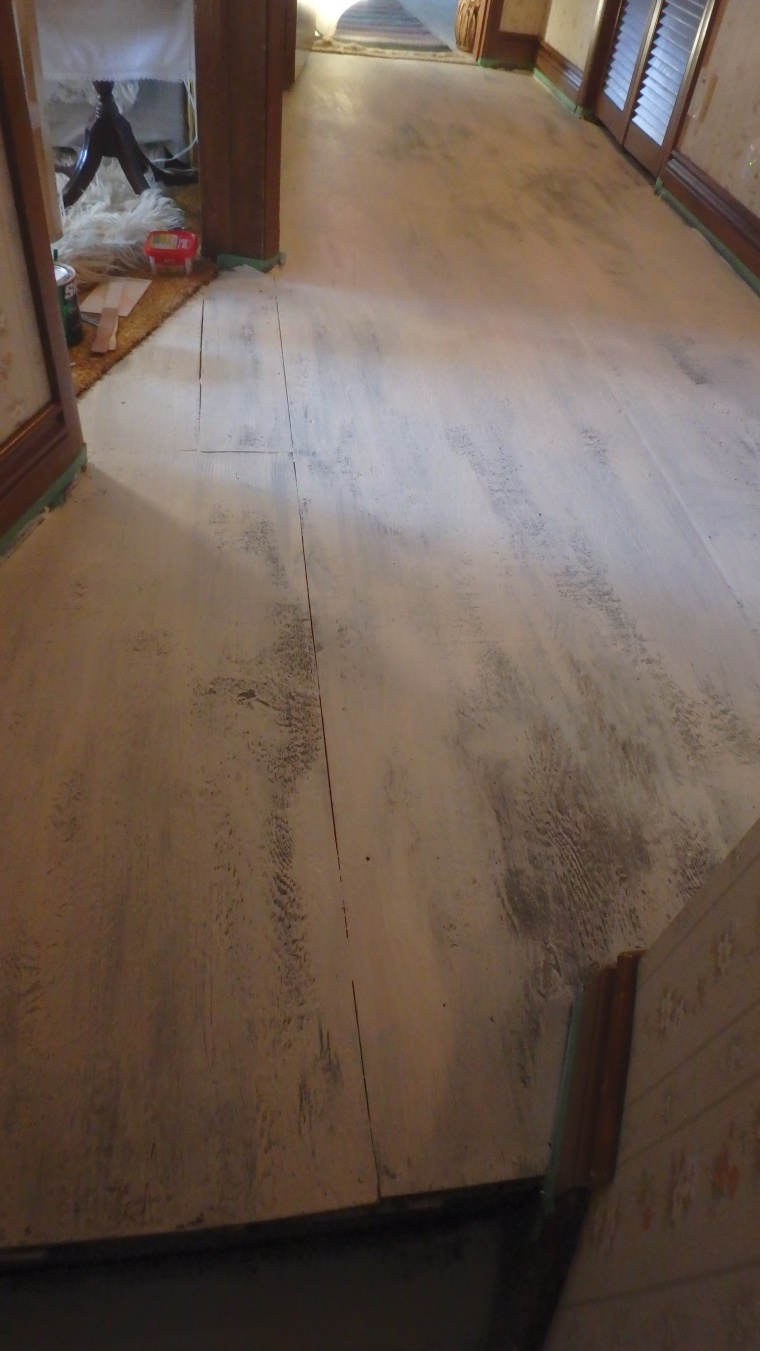
The second-last step, then is to use a yardstick and start painting on lines with a very thin little artist’s brush. I wanted to do it like it was narrow plank, then wide plank, alternating (as the cracks in some of the plywood that I’d left were thinner, but I didn’t want the whole floor to be that ‘narrow-plank’ look. So, paint these black lines to replicate the cracks. But you don’t want to use thick black lines all along, as that would be too drastic as well, and very zebra-like! So I painted lightly, then strong, lightly, then strong. And after some of the lines dried, I’d even smudge a bit with some more white. Here’s the final effect with lines:
And here’s how I solved the step transition problem. I wanted colours brought in from the blond of the hardwood on the landing, and some dark browns from the furniture and wainscotting and quilt, as well as some of the golds and peaches in the quilt. ta-dah!

Actually, I added even darker peachy-orange streaks to the flower and sponge-paint after this photo was taken, but I don’t seem to have the photos I took of THAT anymore! Anyway, letting some of the streaked white-grey of the upper floor show through, whilst segueing the colours of the blond floor and the quilt seems to have done the trick:
After this, I put on two coats of poly-urethane (just satin/matte – you don’t want it shiny if the effect is meant to be old plank boards!). Obviously, I don’t LIKE polyurethane, as it’s not friendly to the environment, but it IS a necessary evil if you don’t want to be painting your floor every 6 months!
And here are the final two shots, with Mom’s rug from Turkey and her antique desks put back in place. When she and Richard saw it, they couldn’t BELIEVE it wasn’t actually old white-washed pine planks. I think we could say, in fact, they were FLOORED!


